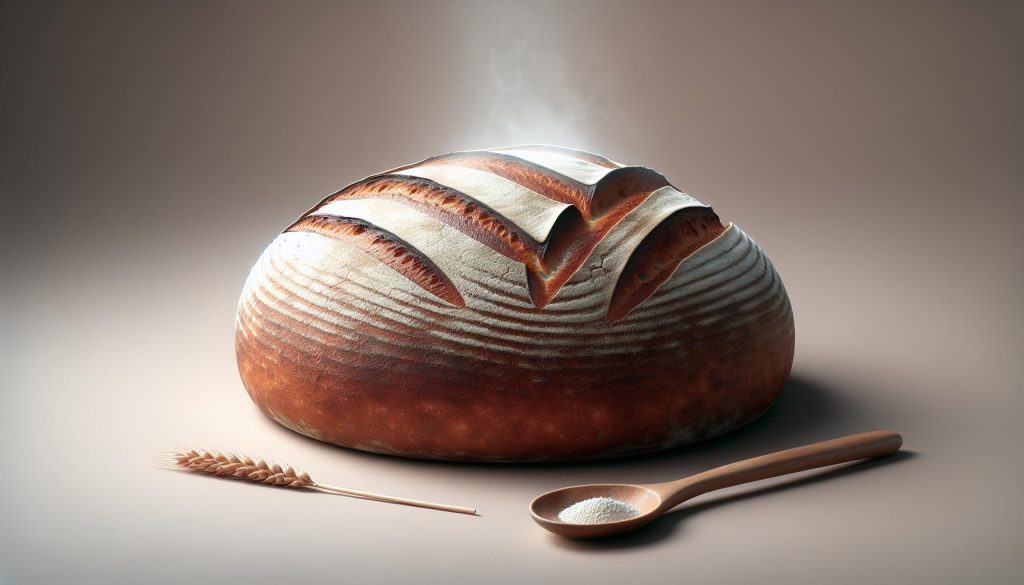
Sourdough Bread Recipe: Artisanal Loaf with Tangy Perfection
Are you ready to elevate your bread game to a level so high it should probably come with a warning label? Welcome to the world of sourdough, where the crust crackles like a good dad joke and the tangy flavor dances a little jig on your taste buds. In this article, we’ll guide you through the secrets of crafting the perfect artisanal loaf that’s not just bread—it’s an experience. Think of it as a delicious science experiment that even your gluten-sensitive friends will respect. So, grab your apron and your starter (don’t worry, it’s not a pet; just feed it flour and water), and let’s embark on this delightful journey to sourdough supremacy! Your kitchen is about to become a haven of cozy aromas and carb-laden dreams. Let’s get started!
Contents
- Understanding the Basics of Sourdough Starter and Fermentation
- Ingredients That Make Your Sourdough Shine
- Key Ingredients for Your Sourdough Masterpiece
- The Importance of Kneading and Shaping Your Dough
- Mastering the Proofing Process for That Perfect Crust
- Baking Techniques for Achieving Tangy Flavor and Ideal Texture
- Troubleshooting Common Sourdough Challenges
- Storing and Enjoying Your Artisanal Sourdough Loaf
- Frequently Asked Questions
- In Retrospect
Understanding the Basics of Sourdough Starter and Fermentation
Creating a sourdough starter is akin to cultivating a living organism. At its core, a sourdough starter is a mixture of flour and water that captures wild yeast and bacteria from the environment. This process initiates fermentation, which is essential for producing the characteristic texture and flavor of sourdough bread. Understanding how to maintain your starter effectively is key, as it feeds on the flour and produces gases, creating that delightful rise.
The fermentation process not only leavens the bread but also contributes to its unique tangy flavor. Here are some fundamental concepts to keep in mind:
- Wild Yeast: Naturally present in the environment, wild yeast helps the dough to rise.
- Lactic Acid Bacteria: These bacteria develop during fermentation, imparting the sour taste.
- Hydration Levels: A wetter starter will ferment faster, while a drier starter may develop a more complex flavor profile.
To illustrate the relationship between feeding schedule and fermentation activity, consider the following table:
| Feeding Schedule | Fermentation Activity | Flavor Development |
|---|---|---|
| Every 12 hours | Very Active | Strong Tang |
| Every 24 hours | Moderately Active | Balanced Flavor |
| Every 48 hours | Slow | Subtly Sour |
By mastering these elements of your sourdough starter and its fermentation process, you’ll lay the foundation for an artisanal loaf that is not only impressive in its appearance but also brings a delightful tangy perfection to your table.

Ingredients That Make Your Sourdough Shine
Key Ingredients for Your Sourdough Masterpiece
To craft an exceptional sourdough loaf that bursts with flavor and that perfect tang, the quality of your ingredients is paramount. Here’s what you’ll need:
- High-Quality Flour: Opt for unbleached bread flour or a blend that includes whole grain varieties. These options provide the necessary protein content for great gluten development.
- Active Sourdough Starter: This living culture is the heart of your bread. Feed your starter regularly to ensure it’s active and bubbly, which contributes to the bread’s unique sour flavor.
- Filtered Water: Water affects the taste and texture of your sourdough. Using filtered water helps avoid any unwanted chemicals and ensures that you’re starting with a clean slate.
- Salt: Sea salt or kosher salt enhances flavor and strengthens gluten. It’s essential not only for taste but also for controlling fermentation.
| Ingredient | Role |
|---|---|
| Flour | Provides structure and flavor |
| Sourdough Starter | Fermentation and sour flavor development |
| Water | Hydration and gluten formation |
| Salt | Flavor enhancement and fermentation regulation |
Understanding these components and their interactions will empower you to make adjustments based on your taste preferences and the specific characteristics of your local ingredients. By sourcing the best materials, your sourdough will not only rise beautifully but also shine with flavor at every bite!

The Importance of Kneading and Shaping Your Dough
Kneading and shaping your dough are essential steps in the sourdough bread-making process that contribute significantly to the final texture and flavor of your loaf. When you knead the dough, you are developing the gluten, which gives the bread its structure and chew. Proper gluten development ensures that the bread will rise well and hold its shape during baking, resulting in that coveted crust and airy crumb.
Shaping is equally important as it gives your dough a specific form that influences its rise and appearance. Here are some key reasons to focus on these practices:
- Texture Enhancement: Kneading creates a smooth, elastic dough that helps trap air, allowing for better fermentation and a lighter loaf.
- Shape Stability: Shaping your dough prepares it for the final rise, ensuring that it maintains its intended form and results in an aesthetically pleasing loaf.
- Flavor Development: During the kneading process, you promote fermentation by thoroughly mixing the ingredients, leading to a complex flavor profile that characterizes artisanal sourdough.
To illustrate the difference that kneading and shaping can make, consider this table comparing two loaves – one that has gone through proper kneading and shaping and one that hasn’t:
| Attribute | Proper Technique | Poor Technique |
|---|---|---|
| Texture | Soft and Chewy | Dense and Gummy |
| Crust | Golden and Crisp | Soft and Pale |
| Flavor | Rich and Tangy | Flat and Boring |
Incorporating diligent kneading and shaping into your sourdough routine will elevate your bread baking skills, leading to loaves that are not only visually appealing but also deliciously satisfying. Embrace these techniques for a truly artisanal experience!

Mastering the Proofing Process for That Perfect Crust
Achieving the ideal crust on your sourdough bread begins long before it hits the oven. The proofing process plays a critical role in developing the gluten structure and enhances the overall flavor profile. During this time, the dough ferments, allowing the beneficial bacteria and wild yeasts to work their magic, creating air pockets that will expand and create a beautifully textured crumb.
To master the proofing process, keep these essential tips in mind:
- Temperature Matters: A warm environment (around 75°F to 80°F) encourages fermentation. Use a proofing box or warm spot in your kitchen to keep the dough cozy.
- Timing is Key: While typical proofing could take 4-6 hours for bulk fermentation, don’t rush it. Watch for the dough to double in size rather than following a strict clock.
- Gentle Handling: When shaping your dough, treat it with care. Degassing too aggressively can hinder the development of those airy bubbles.
- Experiment with Techniques: Try bulk fermentation followed by a bench rest, then shape and let it proof again. Consider different methods like the stretch and fold to encourage strength in your dough.
To deepen your understanding of the process, here’s a simple table summarizing different proofing techniques and their effects:
| Technique | Benefits | Best For |
|---|---|---|
| Bulk Fermentation | Maximizes flavor development | Rich, tangy crumb |
| Bench Rest | Relaxation of gluten | Even shaping |
| Final Proof | Perfect oven spring | Artistic crust formation |

Baking Techniques for Achieving Tangy Flavor and Ideal Texture
Achieving the perfect tang and texture in sourdough bread relies heavily on specific baking techniques that enhance the overall flavor profile and crumb structure. One of the primary factors is the use of a **sourdough starter** that is well-maintained and fully active. This unique culture not only contributes to the tanginess but also aids in gluten development, leading to a beautiful loaf with an airy crumb and chewy crust. To foster this tangy flavor, consider the following techniques:
- Long Fermentation: Allowing the dough to ferment slowly at a cooler temperature enhances the sourness and gives the development of complex flavors.
- Hydration Levels: Increasing the hydration of your dough creates a more open crumb structure, which can enhance the texture and flavor distribution within the loaf.
- Autolyse Method: Resting the flour and water before adding the starter allows the flour to fully hydrate, improving gluten formation and overall dough handling.
Maintaining the right baking temperature is also crucial in creating that artisanal crust and texture. Baking your sourdough in a **preheated Dutch oven** traps steam, helping the loaf achieve a beautiful rise and golden-brown crust. Here’s a simple guide to ensure you’re set up for success:
| Baking Stage | Temperature (°F) | Duration |
|---|---|---|
| Initial Bake (Cover On) | 450 | 30 minutes |
| Final Bake (Cover Off) | 425 | 15-20 minutes |
By mastering these techniques, you can elevate your sourdough bread, achieving that sought-after tang and artisanal texture that will have everyone coming back for more.

Troubleshooting Common Sourdough Challenges
Even seasoned bakers can encounter obstacles when making sourdough bread. Understanding how to troubleshoot these common issues can transform a loaf that misses the mark into one of tangy perfection.
Underproofed Dough: If your sourdough isn’t rising as expected, it might be underproofed. This can lead to dense bread with little flavor. Here’s how to fix it:
- Increase the proofing time.
- Ensure the dough is kept in a warm environment.
- Look for dough doubling in size as a sign of proper fermentation.
Overproofed Dough: Conversely, an overproofed dough can collapse during baking, resulting in a flat loaf. To avoid this:
- Keep an eye on the time and conditions.
- Consider using a poke test—if it springs back slowly, it’s good to go!
- If you’re unsure, a shorter proof can be better than an extended one.
Unwanted Sourness: If your bread is too sour, it may be due to excessive fermentation. Here are some adjustments:
- Shorten the fermentation time.
- Feed your starter more frequently to create a more balanced flavor.
- Experiment with different flours or hydration levels to mellow the taste.
Unexpected Crustiness: A crust that’s too hard can be a sign of excessive baking time or temperature. Consider these solutions:
- Reduce the baking time by checking for doneness earlier.
- Lower the temperature, and use steam during the first few minutes of baking.
- Wrap the bread after baking to soften the crust if needed.
Maintaining a journal of your baking experiences can also help identify patterns in challenges faced and solutions found. Embrace these errors as part of the learning process, and you’ll soon be crafting perfect artisanal loaves with ease.

Storing and Enjoying Your Artisanal Sourdough Loaf
Once your artisanal sourdough loaf has cooled to room temperature, it’s essential to store it properly to maintain its delightful crust and tender crumb. Here are some excellent methods for storage:
- Bread Box: Place your loaf in a wooden or cardboard bread box to keep it fresh while allowing airflow.
- Paper Bag: Wrap your sourdough in a paper bag. This method prevents excessive moisture, preserving the crust texture.
- Kitchen Towel: Alternatively, you can wrap the bread in a clean kitchen towel. It provides protection while allowing it to breathe.
- Freezing: For longer storage, slice your loaf and wrap individual pieces in plastic wrap, then place them in a freezer bag. This way, you can enjoy freshly toasted slices whenever you desire.
To savor that tangy perfection at its best, it’s advisable to enjoy your sourdough within the first few days of baking. If you’re eager to indulge in its unique flavor, consider the following:
- Toasting: A quick toast enhances the bread’s flavor, creating a crispy exterior that pairs beautifully with butter, jam, or cheese.
- Pairing with Favorites: Serve slices with your favorite spreads, soups, or as a side with a hearty salad to elevate your dining experience.
- Teaching and Sharing: Host a sourdough tasting with friends, where everyone can share their favorite ways to enjoy this artisan creation.
With its delightful crunch and aromatic tang, your carefully crafted sourdough loaf deserves to be cherished and celebrated at every meal.
Frequently Asked Questions
Q&A: Sourdough Bread Recipe – Artisanal Loaf with Tangy Perfection
Q: What makes sourdough bread different from other types of bread?
A: Sourdough bread is unique because it is leavened with naturally occurring wild yeast and lactic acid bacteria instead of commercial yeast. This fermentation process gives sourdough its distinctive tangy flavor and chewy texture. The longer fermentation time also enhances the bread’s digestibility and nutritional profile.
Q: Can you explain how to create a sourdough starter?
A: Absolutely! To create a sourdough starter, you’ll need just flour and water. Start by mixing equal parts of whole wheat flour and water in a jar. Feed it daily with more flour and water while discarding a portion to prevent it from becoming too large. It usually takes about 5 to 7 days for the starter to become bubbly and ready for baking.
Q: Do I need any special equipment to make sourdough bread?
A: While you don’t need specialized equipment, a few tools can make the process easier. A digital kitchen scale for precise measurements, a Dutch oven or a baking stone for even heat distribution, and a bench scraper for handling dough are helpful. You might also want to invest in a lame or sharp knife for scoring the dough before baking.
Q: How do I achieve the perfect crust on my sourdough loaf?
A: To achieve that perfect crust, you need steam during the first part of baking. Using a Dutch oven works wonders because it traps steam. Preheat the Dutch oven, then carefully place the dough inside and cover it for the first half of baking. This method helps create a crispy crust while keeping the inside moist.
Q: What is the ideal fermentation timeline for the dough?
A: The ideal fermentation timeline can vary depending on the room temperature. Generally, bulk fermentation lasts about 4 to 6 hours at room temperature, followed by a few hours for proofing after shaping the dough. You can also refrigerate the shaped loaf overnight for a slow fermentation that enhances flavor, which many bakers prefer.
Q: How do I know when my sourdough is ready to bake?
A: A well-proofed sourdough loaf will have risen significantly and should feel light and airy when you gently poke it. The dough should slightly spring back but not completely deflate. If using the “poke test,” the indent should hold for a second before slowly filling back in.
Q: What should I do if my sourdough doesn’t rise well?
A: If your sourdough doesn’t rise well, it could be due to an inactive starter, insufficient fermentation time, or temperature issues. Make sure your starter is bubbly and active before using it. You can also try adjusting fermentation times and ensuring your dough is kept in a warm environment.
Q: Is there a way to customize the flavor of my sourdough bread?
A: Absolutely! You can customize your sourdough by adding ingredients like herbs, cheese, nuts, seeds, or dried fruits. Just keep in mind that adding ingredients can affect hydration levels, so you may need to adjust the flour or water accordingly. Experimenting is part of the fun!
Q: What’s the best way to store homemade sourdough bread?
A: To store your sourdough bread, let it cool completely after baking, then wrap it in a clean kitchen towel or paper bag to keep it from getting too soft. For longer storage, slice the bread and place it in a freezer-safe bag, allowing you to toast slices directly from the freezer. This keeps the bread fresh and maintains its texture.
Q: Can sourdough bread be made gluten-free?
A: Yes, it’s possible to make gluten-free sourdough, but it requires different flours like brown rice, sorghum, or buckwheat, combined with gluten-free starches. You’ll also need a gluten-free starter, which can be created using similar methods as traditional starters. However, the texture and flavor will differ from traditional sourdough.
This Q&A captures the essence of artisanal sourdough bread-making while addressing common queries. With a little patience and practice, you’ll be well on your way to creating delicious sourdough at home!
In Retrospect
As you embark on your sourdough journey, remember that each loaf you create is an expression of your personal touch and passion for baking. With each rise and fall of the dough, you’re not just making bread; you’re cultivating a craft that connects you to a centuries-old tradition. So gather your ingredients, nurture that starter, and embrace the art of fermentation. Whether you share your artisanal loaf with friends or savor it in solitude, you’ll find that the tangy perfection of homemade sourdough is a reward that goes beyond taste. Happy baking!